IE7 이하의 브라우저로 접속시 사이트 상단에 업데이트 알림창을 띄웁니다.
FE 개발자를 위한 안드로이드 후려치기 #1 웹뷰 만들기
2023-07-24
Explanation
저는 하이브리드 앱(인앱 브라우저)환경의 웹 애플리케이션을 만드는 일을 자주 하는데요.
일반 웹 애플리케이션 개발에 사용하는 기술 스택과 추가로 필요한 네이티브의 기능들은 앱 개발자분과 상의하며 자바스크립트 인터페이스를 만들어서 사용하고 있습니다.
그러다, 이왕이면 앱(네이티브)의 환경도 조금 알아두면 여러가지로 커뮤니케이션에 있어 도움이 되지 않을까? 하는 마음으로 아주아주 얕게 안드로이드에 대해 알아보려합니다!
작성된 코드는 https://github.com/falsy/blog-post-example/tree/master/android-for-frontend/webview 에서 확인하실 수 있습니다!
이번 글은 그 처음으로 간단하게 프로젝트를 만들고 웹뷰를 만들어볼거에요.
일단 긔긔!!
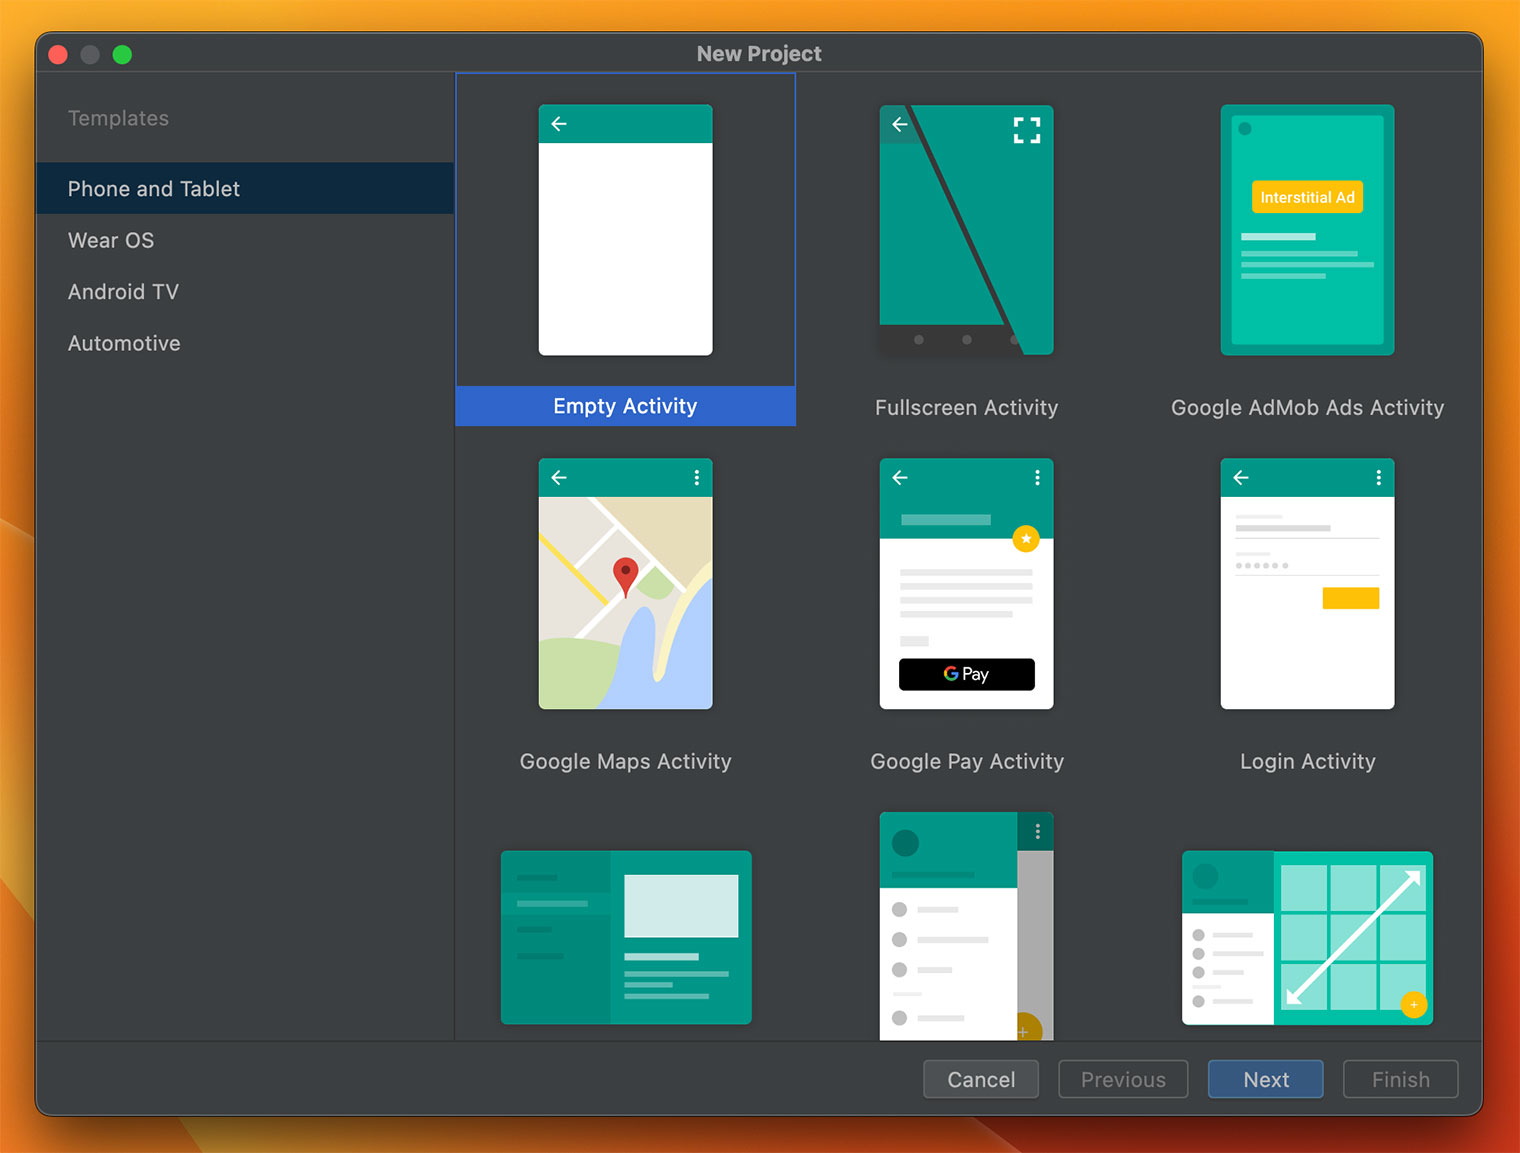
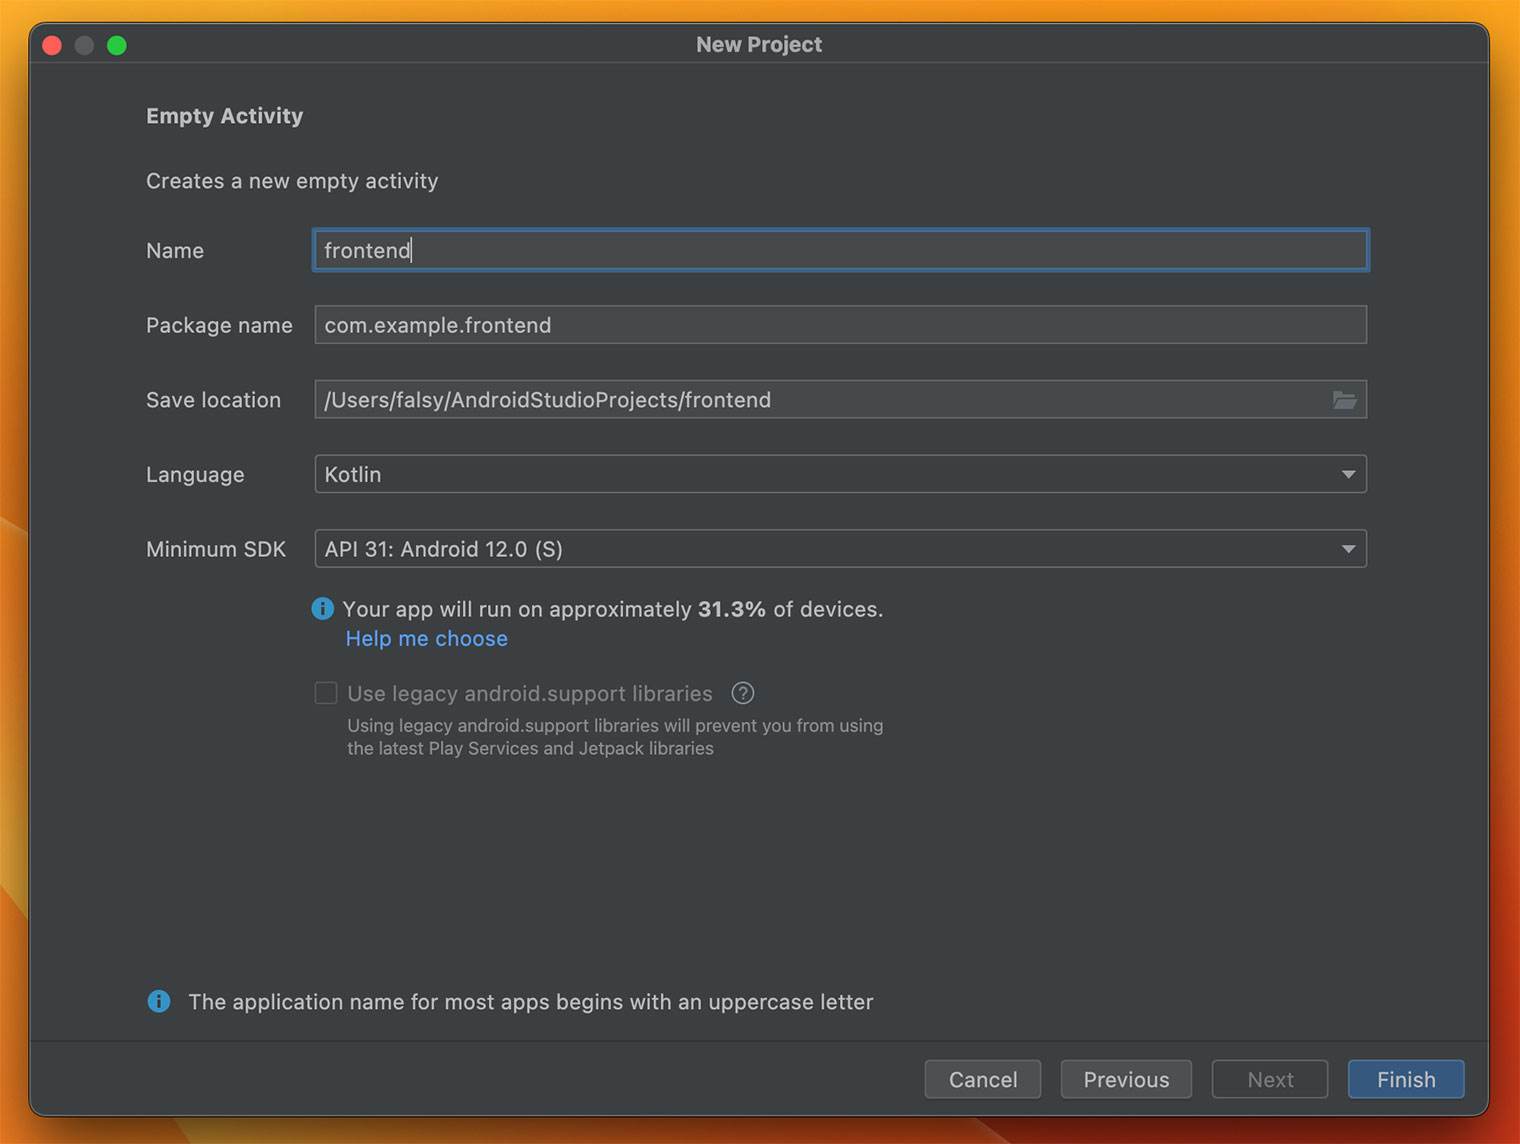
안드로이드 스튜디오를 실행해서 새로운 빈프로젝트를 만들어 줍니다.
저는 frontend 라는 이름으로 API 버전은 31을 선택했습니다!
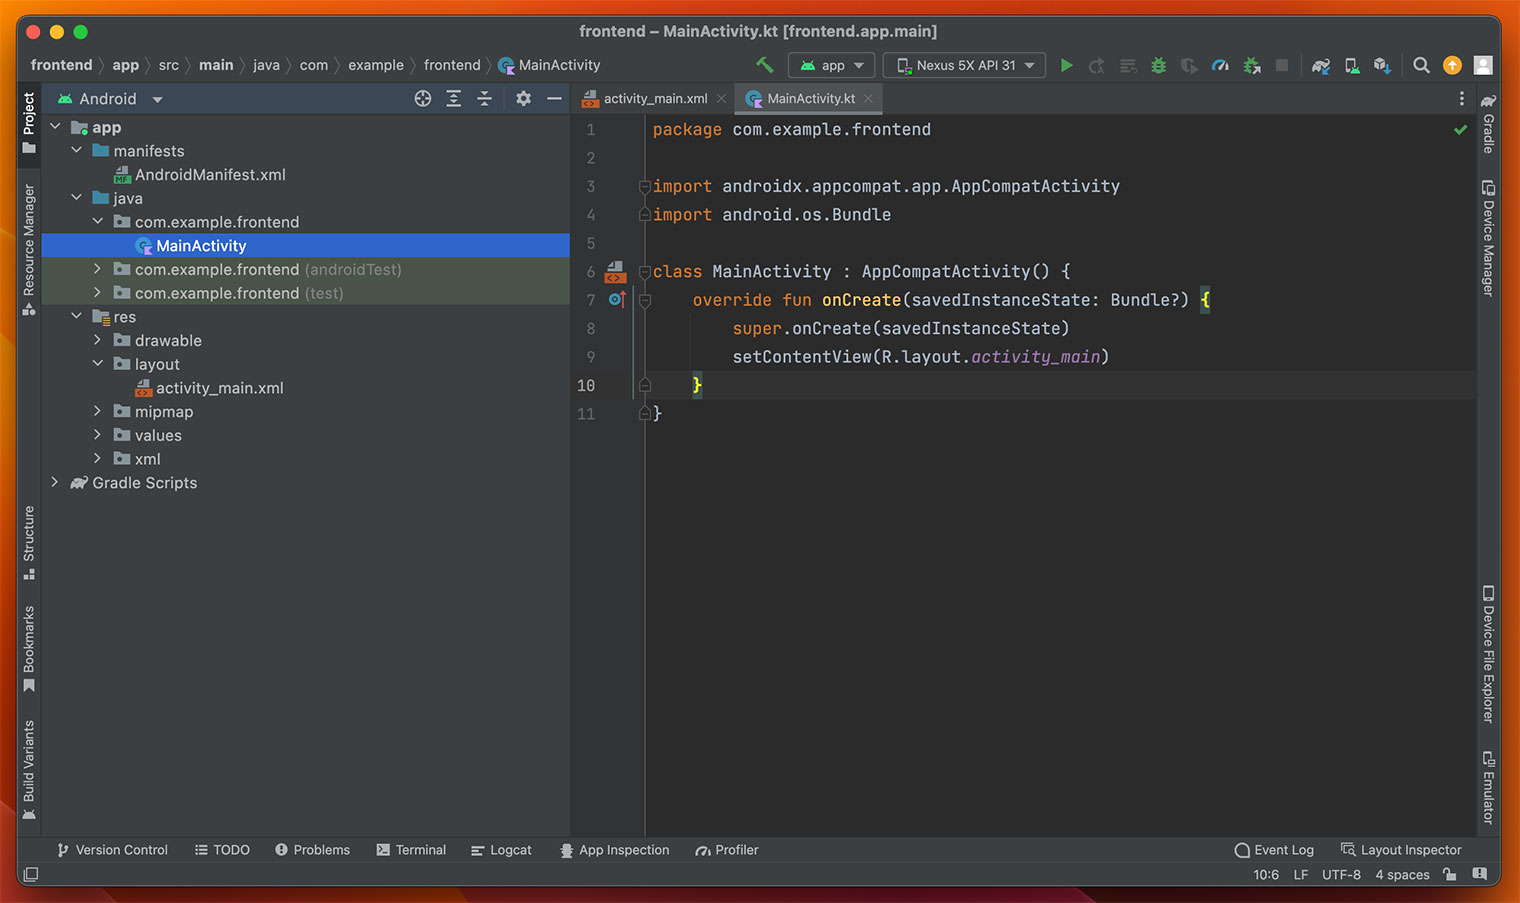
짜잔! 위와 같이 프로젝트가 생성되었습니다.
우리가 자주 사용하게 될 항목은, manifests의 ‘AndroidManifest.xml’ 그리고 java > com.example.frontend의 ‘Activity’들, 그리고 res 안의 ‘xml’파일들, 마지막으로 Gradle Scripts의
build.gradle 정도인 거 같아요.
조금 막돼먹은, 웹유법으로 res 안의 xml 파일들이 HTML과 CSS의 역할을 하고 java 안의 파일들이 JavaScript의 역할을, 그리고 build.gradle가 npm의 package.json 역할을 하고 음… AndroidManifest.xml가 조금 까다롭네요.. 일단 대충 webpack.config.js 정도로 생각하죠!
저는 아주아주 간단하게 react와 webpack을 써서 웹뷰에 들어갈 컨텐츠를 만들었어요
https://github.com/falsy/blog-post-example/tree/master/android-for-frontend/webview/webview
다시 안드로이드로 돌아와서,
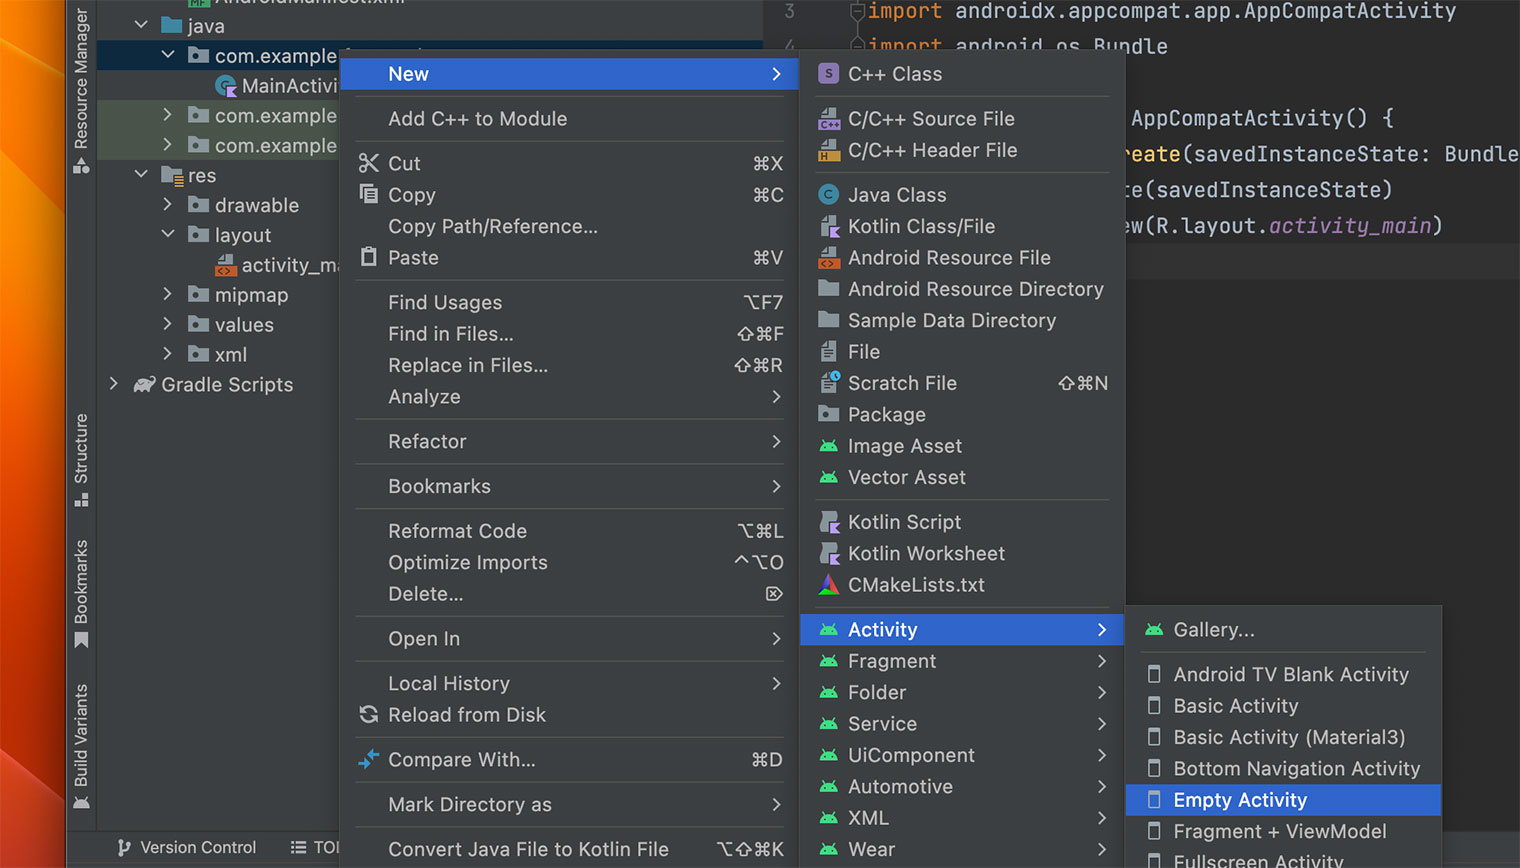
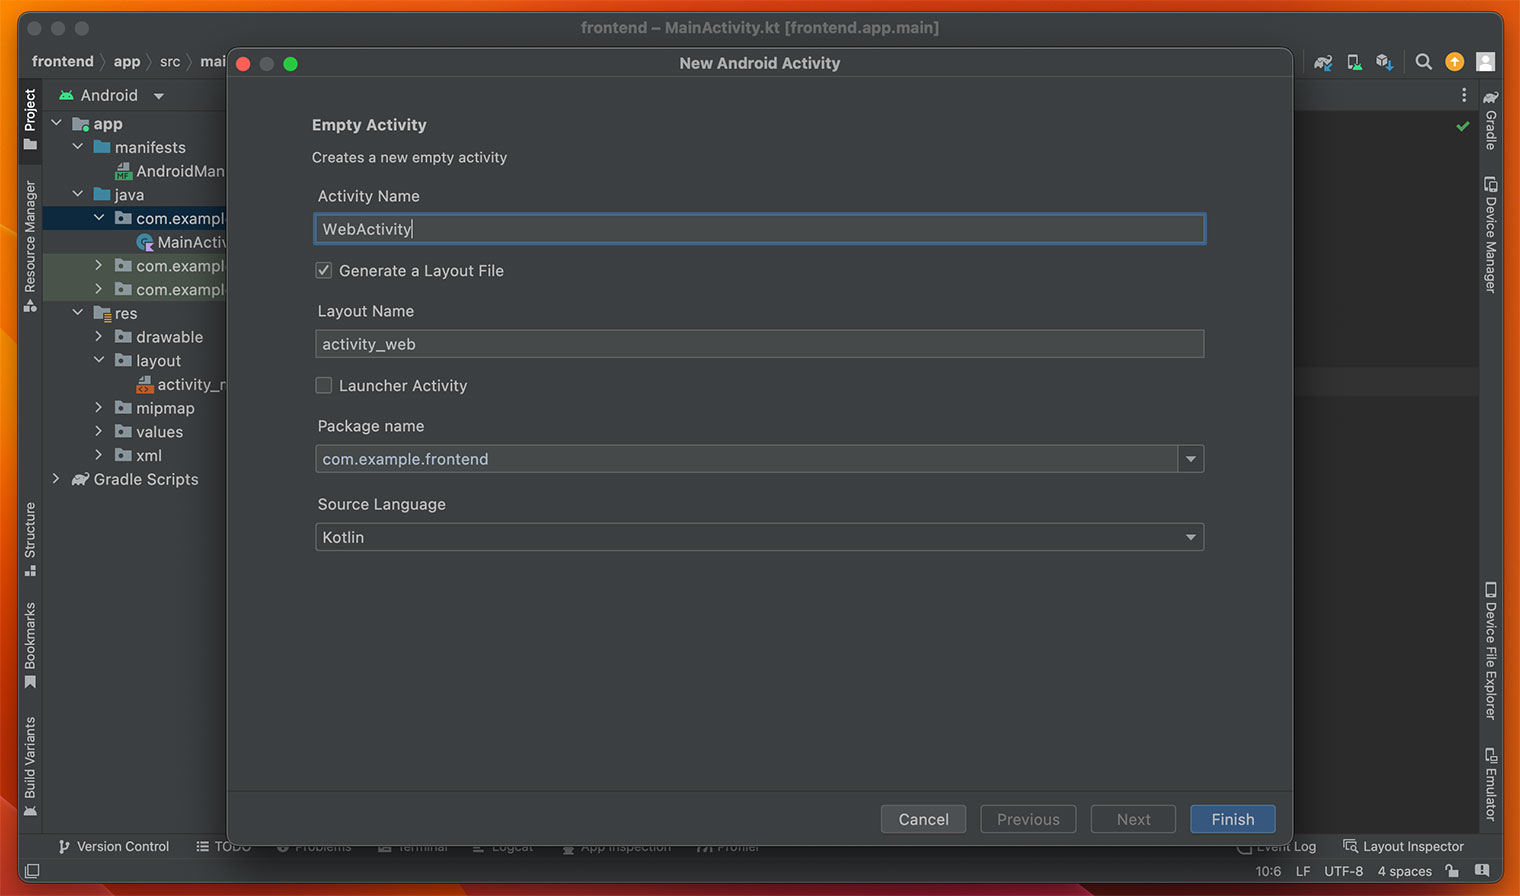
위와 같이 java > com.example.frontend 에서 새로운 빈 액티비티를 만들어 줄게요. 이렇게 만들면 ‘WebActivity’와 res > layout에 ‘activity-web.xml’가 생성된답니다.
우선 activity-web.xml로 가서 웹뷰를 추가해줄게요.
|
1 2 3 4 5 6 7 8 9 10 11 12 13 14 15 16 17 18 19 |
<!-- res/lauout/activity-web.xml --> <?xml version="1.0" encoding="utf-8"?> <androidx.constraintlayout.widget.ConstraintLayout xmlns:android="http://schemas.android.com/apk/res/android" xmlns:app="http://schemas.android.com/apk/res-auto" xmlns:tools="http://schemas.android.com/tools" android:layout_width="match_parent" android:layout_height="match_parent" tools:context=".WebActivity"> <WebView android:id="@+id/webView1" android:layout_width="match_parent" android:layout_height="match_parent" app:layout_constraintBottom_toBottomOf="parent" app:layout_constraintEnd_toEndOf="parent" app:layout_constraintStart_toStartOf="parent" app:layout_constraintTop_toTopOf="parent" /> </androidx.constraintlayout.widget.ConstraintLayout> |
webView1 이라는 id로 웹뷰를 추가했어요.
웹유법으로 하면..
<webview id=”webVew1″ style=”position: absolute; width: 100%; height: 100%; top: 0; left: 0;” />
정도 되겠네요? 호호..
다음으로 WebActivity로 가서 웹뷰가 로드할 URL을 입력해줄게요!
|
1 2 3 4 5 6 7 8 9 10 11 12 13 14 15 16 17 |
// java/com.example.frontend/WebActivity package com.example.frontend import androidx.appcompat.app.AppCompatActivity import android.os.Bundle import android.webkit.WebView class WebActivity : AppCompatActivity() { override fun onCreate(savedInstanceState: Bundle?) { super.onCreate(savedInstanceState) setContentView(R.layout.activity_web) val myWebView: WebView = findViewById(R.id.webView1) myWebView.settings.javaScriptEnabled = true myWebView.loadUrl("http://10.0.2.2:8080") } } |
대충 findViewById가 document.getElementById 같은 건가봐요.
webView1에게 자바스크립트를 사용할 수 있도록 허용해주고(javaScriptEnabled), 웹뷰에 ‘http://10.0.2.2:8080’을 호출하도록 했어요.
10.0.2.2가 어색할 수도 있는데요, 안드로이드에서 PC의 localhost를 가르키는 주소랍니다!
앞서 만든 웹 컨텐츠를 웹팩 개발 서버로 8080포트로 열거라서 위와 같이 설정하였어요.
manifests의 ‘AndroidManifest.xml’로 가서 인터넷을 접속할 수 있도록 몇가지 설정을 해줘야해요.
|
1 2 3 4 5 6 7 8 9 10 11 12 13 14 15 16 17 18 19 20 21 22 23 24 25 26 27 28 29 30 31 32 33 34 35 36 37 38 39 40 41 42 |
<!-- manifests/AndroidManifest.xml --> <?xml version="1.0" encoding="utf-8"?> <manifest xmlns:android="http://schemas.android.com/apk/res/android" xmlns:tools="http://schemas.android.com/tools"> <!-- 여기 --> <uses-permission android:name="android.permission.INTERNET" /> <application android:allowBackup="true" android:usesCleartextTraffic="true" android:dataExtractionRules="@xml/data_extraction_rules" android:fullBackupContent="@xml/backup_rules" android:icon="@mipmap/ic_launcher" android:label="@string/app_name" android:roundIcon="@mipmap/ic_launcher_round" android:supportsRtl="true" android:theme="@style/Theme.AppCompat.Light.NoActionBar" tools:targetApi="31"> <activity android:name=".WebActivity" android:exported="false"> <meta-data android:name="android.app.lib_name" android:value="" /> </activity> <activity android:name=".MainActivity" android:exported="true"> <intent-filter> <action android:name="android.intent.action.MAIN" /> <category android:name="android.intent.category.LAUNCHER" /> </intent-filter> <meta-data android:name="android.app.lib_name" android:value="" /> </activity> </application> </manifest> |
그리고 추가로 안드로이드 9(API 28) 버전부터 웹뷰에 http를 허용하지 않아서, 위와 같이 application에 ‘android:usesCleartextTraffic=”true”‘ 속성을 추가해서 허용해 주었어요.
그리고 앱의 액션바가 불필요해서 테마를 ‘android:theme=”@style/Theme.AppCompat.Light.NoActionBar”‘ 로 변경하였습니다!
자 이제! 메인 액티비티에 웹뷰 액티비티를 호출하는 기능을 추가할거에요.
우선, activity-main.xml를 열어서 아래와 같이 버튼을 추가합니다.
|
1 2 3 4 5 6 7 8 9 10 11 12 13 14 15 16 17 18 19 20 21 22 |
<!-- res/lauout/activity-main.xml --> <?xml version="1.0" encoding="utf-8"?> <androidx.constraintlayout.widget.ConstraintLayout xmlns:android="http://schemas.android.com/apk/res/android" xmlns:app="http://schemas.android.com/apk/res-auto" xmlns:tools="http://schemas.android.com/tools" android:layout_width="match_parent" android:layout_height="match_parent" tools:context=".MainActivity"> <Button android:id="@+id/button" android:layout_width="wrap_content" android:layout_height="wrap_content" android:text="open webview" app:layout_constraintBottom_toBottomOf="parent" app:layout_constraintEnd_toEndOf="parent" app:layout_constraintHorizontal_bias="0.5" app:layout_constraintStart_toStartOf="parent" app:layout_constraintTop_toTopOf="parent" app:layout_constraintVertical_bias="0.5" /> </androidx.constraintlayout.widget.ConstraintLayout> |
이제 MainActivity에 코드를 추가합니다!
|
1 2 3 4 5 6 7 8 9 10 11 12 13 14 15 16 17 18 19 20 |
// java/com.example.frontend/MainActivity package com.example.frontend import android.content.Intent import androidx.appcompat.app.AppCompatActivity import android.os.Bundle import android.widget.Button class MainActivity : AppCompatActivity() { override fun onCreate(savedInstanceState: Bundle?) { super.onCreate(savedInstanceState) setContentView(R.layout.activity_main) val button: Button = findViewById(R.id.button) button.setOnClickListener { val intent = Intent(this, WebActivity::class.java) startActivity((intent)) } } } |
대충 보니까 ‘setOnClickListener’가 ‘addEventListener(“click”, listener)’ 느낌인 거 같죠?!
그리고 Intent 가 자주 보이는데, 정확하게는 모르겠는…
안드로이드를 이루는 4대 컴포넌트(액티비티, 서비스, 브로드캐스트 리시버, 컨텐츠 프로바이더)간의 통신 맡고 있는게 인텐트라고 하네요!
참고. https://sharp57dev.tistory.com/18
대에충, 새로운 액티비티 띄울때 쓰입니다.
