[소소한 개발 일지] Next.js의 SSR와 RSC에 대해서 알아보자
FE 개발자를 위한 안드로이드 후려치기 #3 자바스크립트 인터페이스로 새로운 웹뷰 액티비티 띄우기
2023-08-02
Explanation
오늘은 지난 주말에 미루었던 자바스크립트 인터페이스를 통해서 웹뷰에서 새로운 웹뷰 액티비티를 띄우는 것을 해보려고 합니다!
모든 코드는 지난 코드를 기반으로 추가되어서 헷갈리는 부분이 있다면 지난글을 봐주시면 좋을 것 같아요.
지난글: (https://falsy.me/fe-개발자를-위한-안드로이드-후려치기-2-자바스크립트/)
지지난글: (https://falsy.me/fe-개발자를-위한-안드로이드-후려치기-1-웹뷰-만들기/)
작성된 코드는 https://github.com/falsy/blog-post-example/tree/master/android-for-frontend/webview-interface 에서 확인하실 수 있습니다!
웹뷰 액티비티를 만들었던 것처럼 ‘new > Activity > Empty Activity’를 통해 새로운 액티비티를 만들어줄게요.
저는 SubActivity 라는 이름으로 만들어주었어요.
|
1 2 3 4 5 6 7 8 9 10 11 12 13 14 15 16 17 18 19 20 21 |
<!-- res/lauout/activity-sub.xml --> <?xml version="1.0" encoding="utf-8"?> <androidx.constraintlayout.widget.ConstraintLayout xmlns:android="http://schemas.android.com/apk/res/android" xmlns:app="http://schemas.android.com/apk/res-auto" xmlns:tools="http://schemas.android.com/tools" android:layout_width="match_parent" android:layout_height="match_parent" tools:context=".SubActivity"> <WebView android:id="@+id/subWebView" android:layout_width="match_parent" android:layout_height="match_parent" app:layout_constraintBottom_toBottomOf="parent" app:layout_constraintEnd_toEndOf="parent" app:layout_constraintHorizontal_bias="1.0" app:layout_constraintStart_toStartOf="parent" app:layout_constraintTop_toTopOf="parent" app:layout_constraintVertical_bias="0.0" /> </androidx.constraintlayout.widget.ConstraintLayout> |
그리고 subWebView 라는 id 값으로 웹뷰를 만들어주고,
|
1 2 3 4 5 6 7 8 9 10 11 12 13 14 15 16 17 18 19 20 21 |
// java/com.example.frontend/SubActivity package com.example.frontend import androidx.appcompat.app.AppCompatActivity import android.os.Bundle import android.webkit.WebView class SubActivity : AppCompatActivity() { override fun onCreate(savedInstanceState: Bundle?) { super.onCreate(savedInstanceState) setContentView(R.layout.activity_sub) val myWebView: WebView = findViewById(R.id.subWebView) myWebView.settings.javaScriptEnabled = true val url = intent.getStringExtra("URL") if (url != null) { myWebView.loadUrl(url) } } } |
비슷하게 웹뷰를 호출하는 코드를 추가해 주었는데요.
새로 추가된 부분은 ‘val url = intent.getStringExtra(“URL”)’ 이 부분이죠?!
“URL” 이라는 키값으로 추가된 Extra 값을 받아오는 구문이랍니다!
이제 곧 추가할 자바스크립트 인터페이스에서 “URL”이라는 키값을 사용할 거에요.
지난번에 만들었던 자바스크립트 인터페이스 클래스에 새로운 웹뷰 액티비티를 호출할 수 있는 메서드를 추가할 거예요.
|
1 2 3 4 5 6 7 8 9 10 11 12 13 |
// java/com.example.frontend/WebActivity class WebAppInterface(private val activity: AppCompatActivity) { @JavascriptInterface fun showToast(toast: String) { Toast.makeText(activity, toast, Toast.LENGTH_SHORT).show() } @JavascriptInterface fun newWebView(url: String) { val intent = Intent(activity, SubActivity::class.java) intent.putExtra("URL", url) activity.startActivity(intent) } } |
간단하죠! 그리고 인자로 웹뷰에 띄울 URL 정보를 받도록 했어요.
여기서 앞서 미리 정했던 “URL”이라는 이름의 키값으로 인자로 받은 URL 정보를 전달했어요!
|
1 2 3 4 5 6 7 8 9 10 11 12 13 14 15 16 17 18 19 20 21 22 23 24 25 26 |
// src/App.jsx import React from "react" const App = () => { const handleClickNewWebview = () => { if(window.Android) { window.Android.newWebView('https://falsy.me/') } } return ( <p onClick={handleClickNewWebview} style={{ display: 'inline-block', border: '1px solid #bbb', padding: '8px 14px', borderRadius: '5px', fontSize: '14px', background: '#f5f5f5' }}>Open FalsyLab Website</p> ) } export default App |
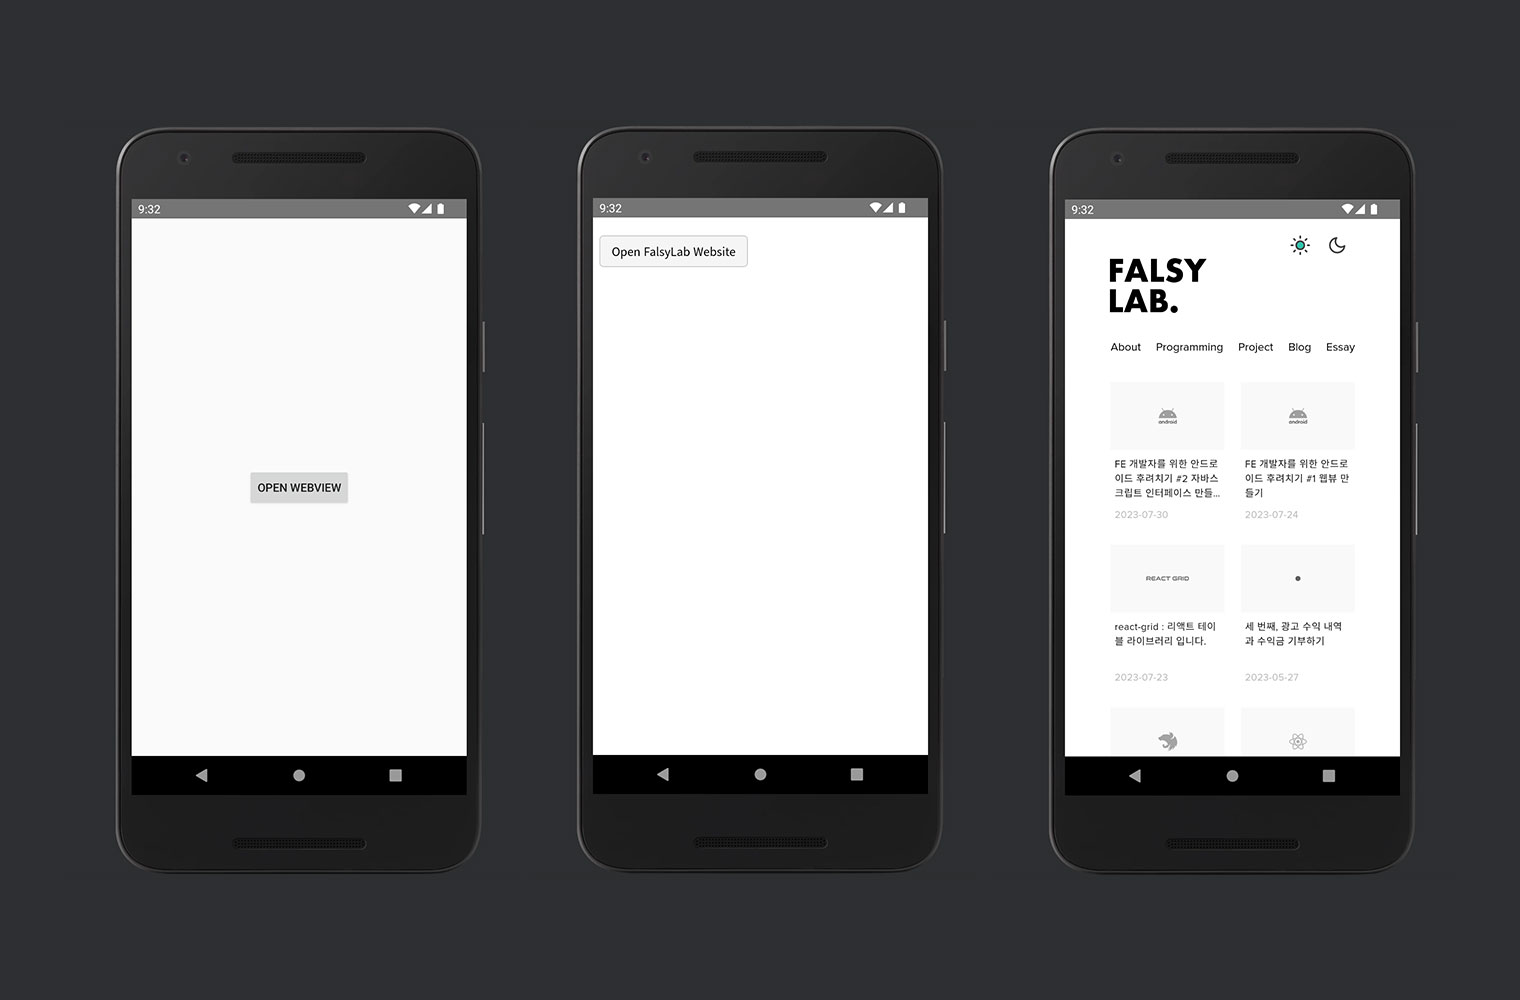
지난글에서 toast를 호출했던 것처럼 새로 만든 ‘newWebView’ 메서드를 호출했어요. 간단하죠?!

짜잔! 이렇게 웹뷰에서 새로운 웹뷰를 띄울 수 있답니다.