
FE 개발자를 위한 안드로이드 후려치기 #1 웹뷰 만들기
React-Native에서 FCM을 통한 알림 수신하기(Android)
2022-11-27
Explanation
이번에는 저번 글에 이어서?? React Native에서, 그중에서도 안드로이드 환경에서 FCM을 연결해서 알림을 받는 과정을 적어보려 합니다.
어찌 보면 웹에서 했을 때와 비슷해서 뚝딱하고 될 줄 알았는데, 생각보다 저는 꽤 오랜 시간이 걸렸네요.
파이어베이스 프로젝트는 생성되었다고 가정하고..
|
1 |
$ npx react-native init falsyFcmExample |
저는 간단하게 위 명령어로 생성하였습니다.
이 글에 사용한 코드는 아래의 링크에서 확인하실 수 있습니다.
https://github.com/falsy/blog-post-example/tree/master/falsyFcmExample
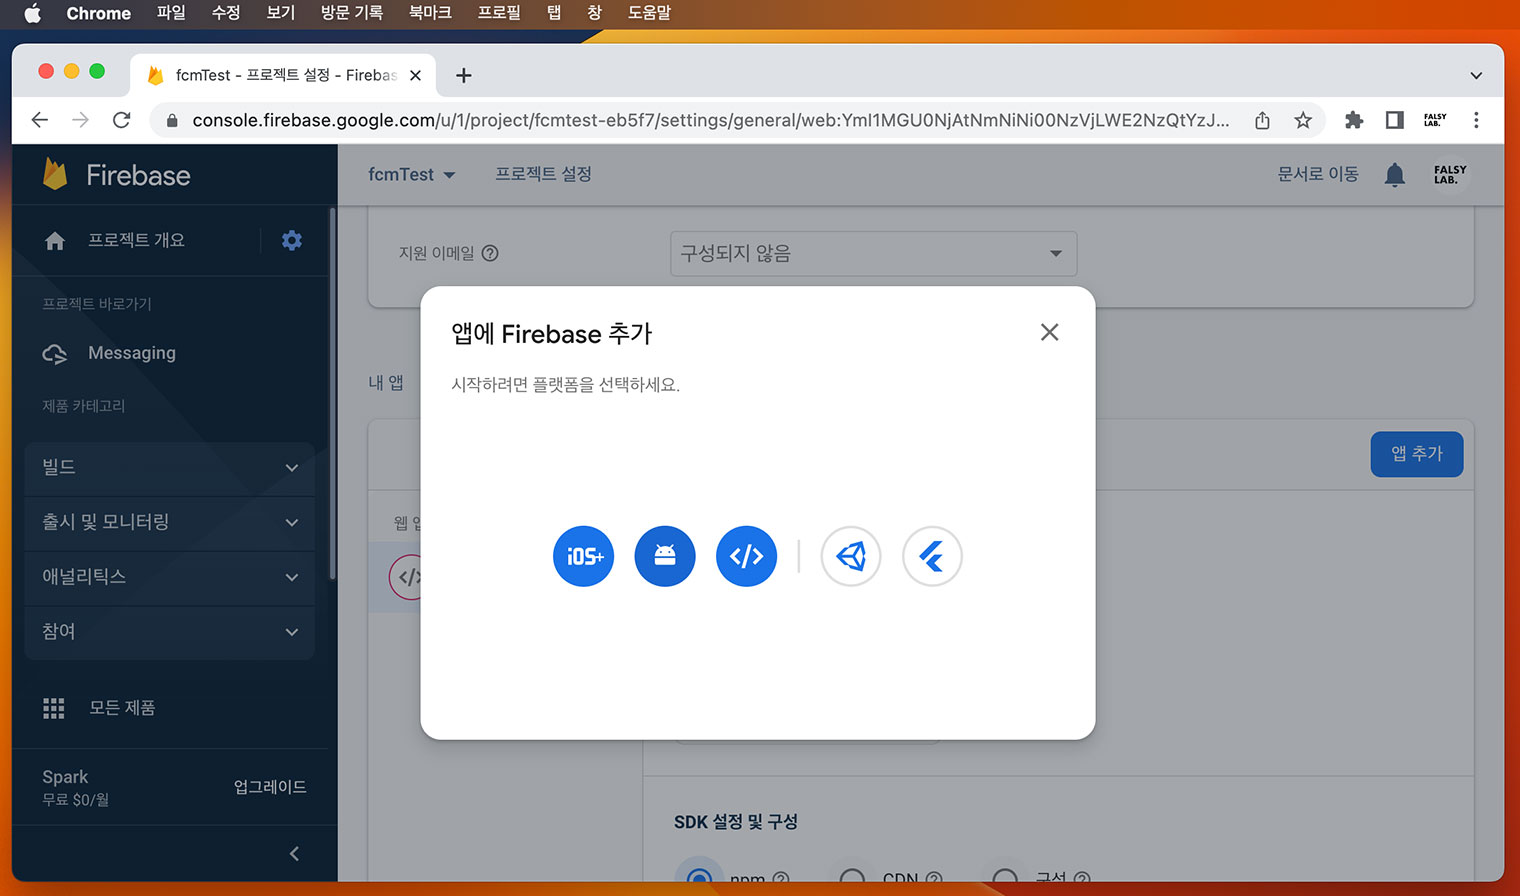
왼쪽에 톱니바퀴 아이콘을 눌러서 ‘프로젝트 설정’ 페이지로 이동 후 스크롤을 내려서 안드로이드 아이콘을 선택해 줍니다.
그리고 패키지 이름을 정해주는데, 플레이스 홀더에 나오듯 ‘com.회사이름.앱이름’ 뭐 이런 순서로 적는 거 인가 봐요. 그래서 저는 ‘com.falsy.example’ 이렇게 작성했습니다.
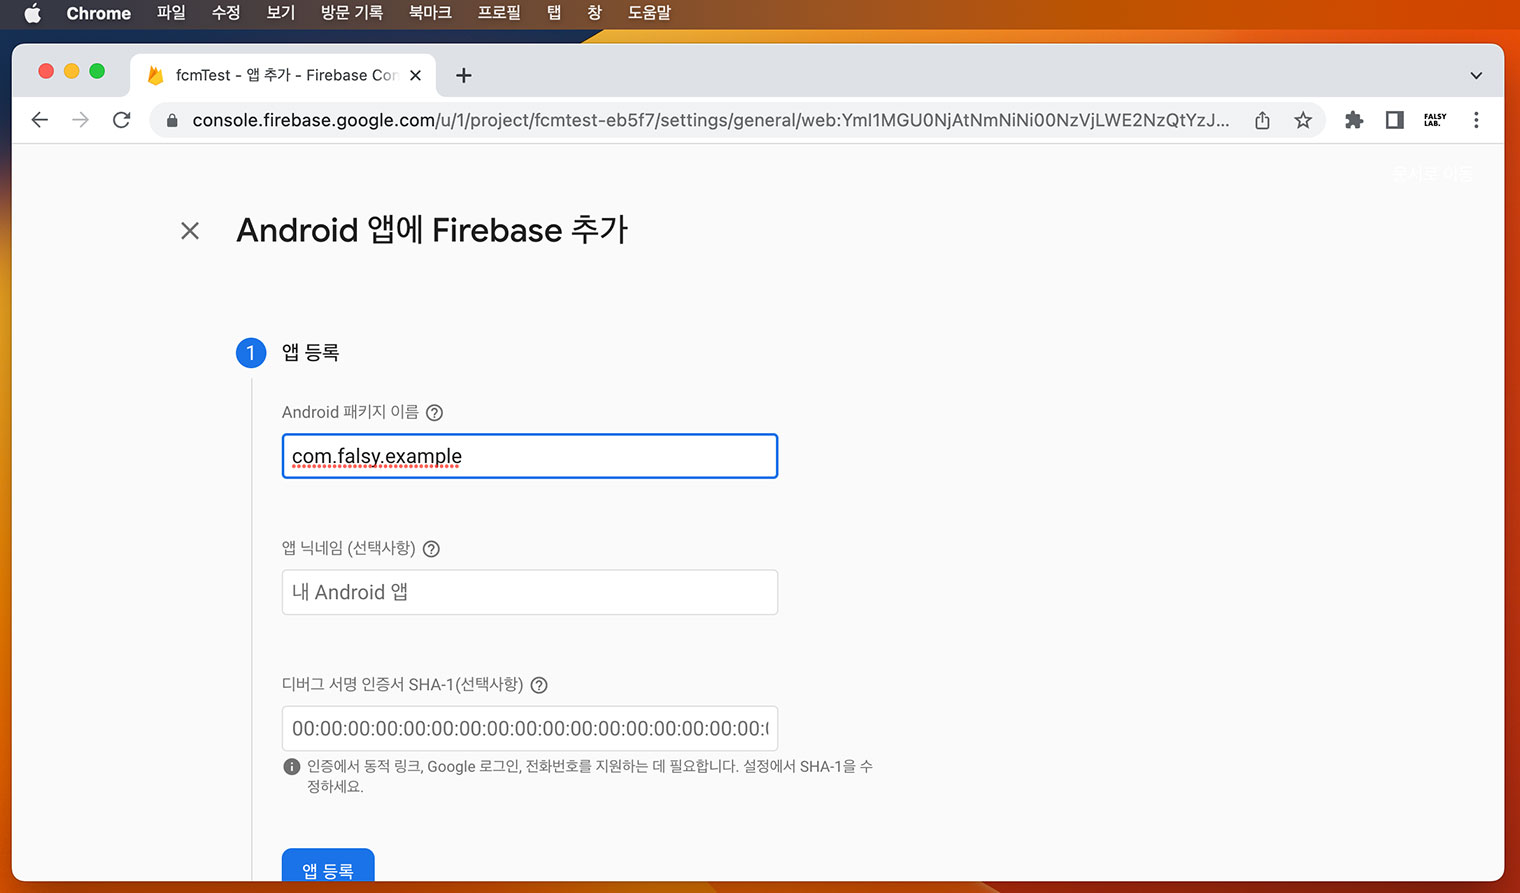
‘앱 등록’ 버튼을 선택후 다음 탭에서 ‘google-services.json’ 파일을 다운로드 받으셔서 ReactNative 디렉토리의 ‘/android/app/’ 디렉토리 안에 넣습니다.
제가 아마도 여기에서 많이 애를 먹은 거 같아요. 사실은 너무 많은 오류들을 많이 봐서 정확하게 어디가 문제인지 모를 정도라서… 이것 저곳 알아보다가 뒤늦게 안드로이드의 프로젝트 명을 바꿔줘야 한다는 글을 봐서 일단 이것도 같이 해봤습니다!
저는 위와 같이 ‘falsyFcmExample’ 이라는 이름으로 React Native를 생성했고, 파이어베이스에서는 ‘com.falsy.example’ 라고 만드는데요, 그래서 ‘falsyFcmExample’ 또는 ‘com.falsyFcmExample’ 으로 생성되어 있는 리액트 네이티브의 패키지명을 변경 해주는 작업을 했답니다.
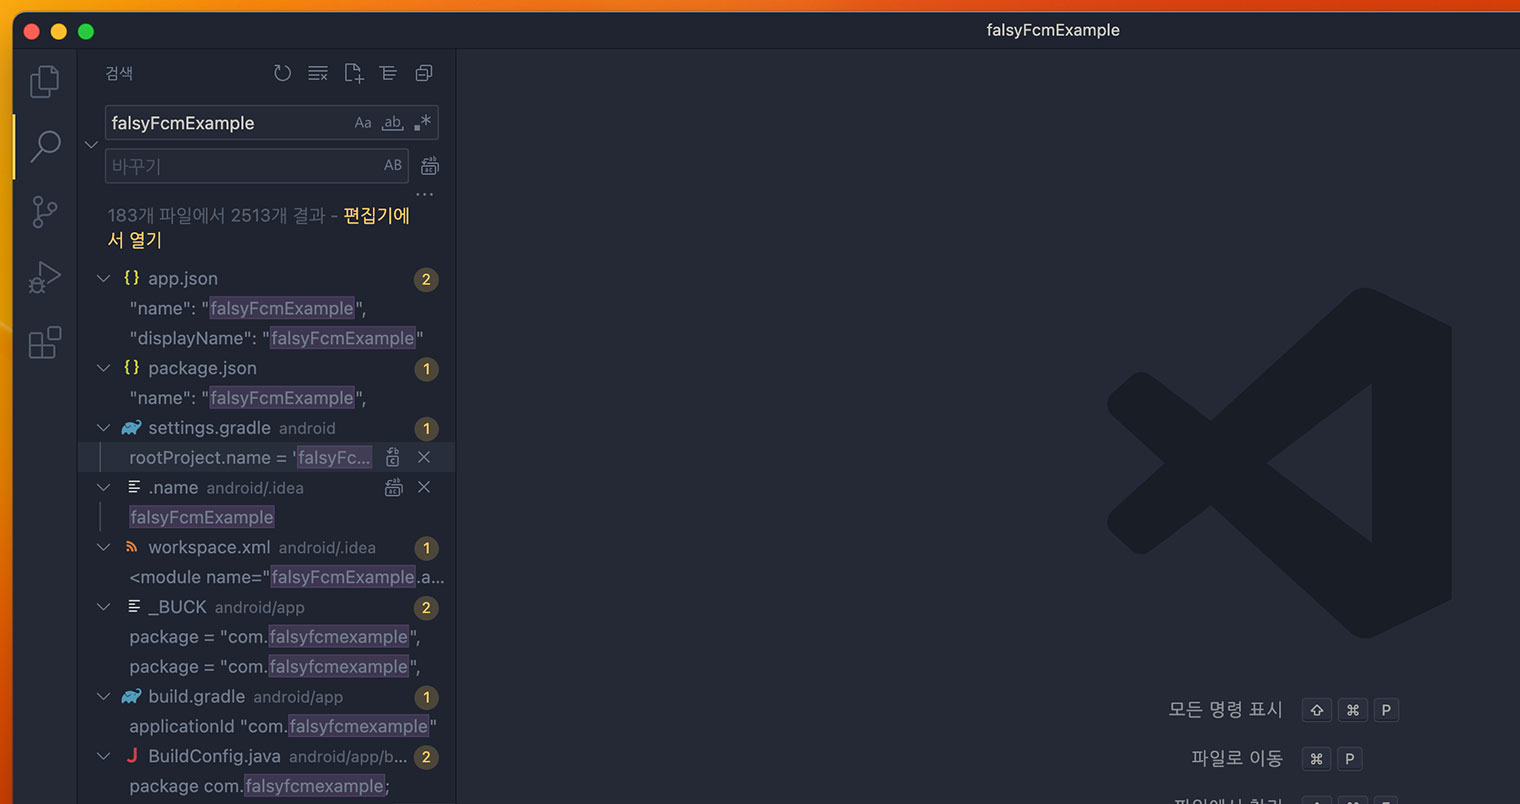
저는 위와 같이 VS Code에서 ‘falsyFcmExample’ 을 검색해서 ‘com.falsy.example’ 로 하나씩 확인하며 바꿔주었는데요.
react-native v0.70.6 기준으로는 아래와 같이 변경하였답니다.
|
1 2 3 4 5 6 7 8 9 10 11 12 13 14 15 16 17 18 19 |
* /App.json // name 부분만 변경하였습니다. * /android/_BUCK * /android/settings.gradle * /android/app/build.gradle * /android/app/src/debug/java/com/falsyfcmexample/ReactNativeFlipper.java * /android/app/src/main/AndroidManifest.xml * /android/app/src/main/java/com/falsyfcmexample/MainActivity.java * /android/app/src/main/java/com/falsyfcmexample/MainApplication.java * /android/app/src/main/java/com/falsyfcmexample/newarchitecture/components/MainComponentsRegistry.java * /android/app/src/main/java/com/falsyfcmexample/newarchitecture/modules/MainApplicationTurboModuleManagerDelegate.java @Override protected synchronized void maybeLoadOtherSoLibraries() { if (!sIsSoLibraryLoaded) { // If you change the name of your application .so file in the Android.mk file, // make sure you update the name here as well. SoLoader.loadLibrary("falsyfcmexample_appmodules"); // 이 부분은 변경하지 않았습니다. sIsSoLibraryLoaded = true; } } |
|
1 2 3 |
// 아래 경로의 하위 데이터는 변경하지 않았습니다. * /android/app/src/main/jni/... * /android/app/build/... |
이게 검색을 좀 해보니까 리액트 네이티브의 버전에 따라서 조금씩 변경해야 하는 파일의 구조가 다른 거 같더라고요… 아직 리액트 리액티브에 대해 잘 알지 못해서, 왠지.. 바꿔야 할 것처럼 느껴지는 친구들 먼저 변경하며 실행해서 오류가 안 날 때까지 시도했답니다…
그리고 기존에 ‘android/app/src/main/java/com/falsyfcmexample/…’ 이렇게 되어있는 디렉토리 구조를 ‘android/app/src/main/java/com/falsy/example/…’ 이렇게 변경해 줍니다.
저는 파이어베이스에서 ‘com.falsy.example’ 이렇게 패키지명을 설정하였기에 ‘com/falsy/example’ 의 구조로 변경해 준 거에요.
|
1 2 3 |
$ npm install @react-native-firebase/app @react-native-firebase/messaging # or $ yarn add @react-native-firebase/app @react-native-firebase/messaging |
위와 같이 ‘@react-native-firebase/app’ 와 ‘@react-native-firebase/messaging’ 를 설치해줍니다.
|
1 2 3 4 5 6 7 8 9 |
// /android/build.gradle buildscript { ... dependencies { ... classpath("com.google.gms:google-services:4.3.14") // 여기 내용을 추가해줍니다. } } ... |
|
1 2 3 4 5 6 7 8 9 10 11 |
// /android/app/build.gradle apply plugin: "com.android.application" apply plugin: "com.google.gms.google-services" // 여기 내용을 추가해줍니다. ... dependencies { ... // Import the Firebase BoM implementation platform('com.google.firebase:firebase-bom:31.1.0') // 여기 내용을 추가해줍니다. implementation 'com.google.firebase:firebase-messaging' // 여기 내용을 추가해줍니다. |
저는 위와 같이 해당 경로의 파일에 위와 같은 내용을 추가해 주었습니다.
여기에서 저는 리액트 네이티브의 보일러 플레이트를 사용했기 때문에 최대한 간단하게 App.js에 아래와 같이 코드를 추가하였습니다.
|
1 2 3 4 5 6 7 8 9 10 11 12 13 14 15 16 17 18 19 20 21 22 23 24 25 26 27 28 29 30 31 32 33 34 35 36 |
//App.js import React, {useEffect} from 'react'; ... import messaging from '@react-native-firebase/messaging'; messaging().setBackgroundMessageHandler(async remoteMessage => { console.log('[Background Remote Message]', remoteMessage); }); ... const App = () => { ... const getFcmToken = async () => { const fcmToken = await messaging().getToken(); console.log('[FCM Token] ', fcmToken); }; useEffect(() => { getFcmToken(); const unsubscribe = messaging().onMessage(async remoteMessage => { console.log('[Remote Message] ', JSON.stringify(remoteMessage)); }); return unsubscribe; }, []); return ( ... ); }; ... export default App; |
안드로이드 스튜디오의 에뮬레이터를 실행시킨 후,
|
1 |
$ npx react-native run-android |
명령어로 실행을 시키면 함께 뜬 터미널에서 위와 같이 토큰이 로그에 출력이 된답니다.
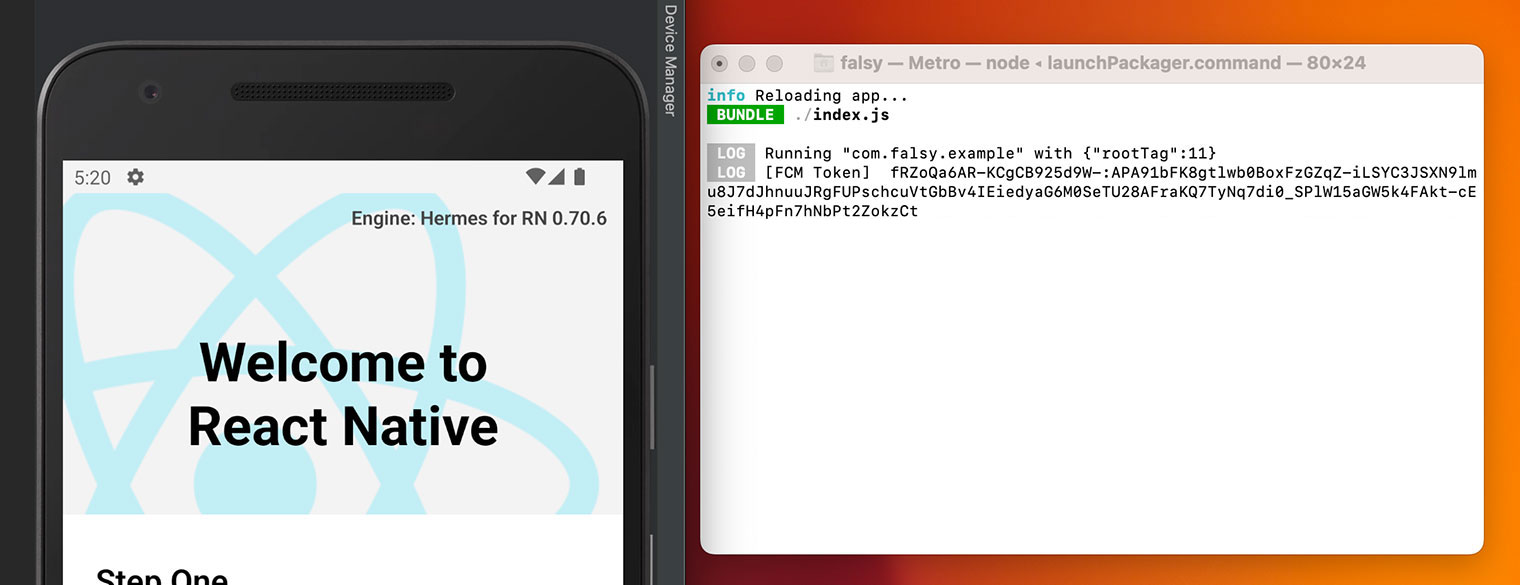
다시 파이어베이스로 돌아가서 ‘참여’ 메뉴에 있는 ‘messaging’을 선택합니다.
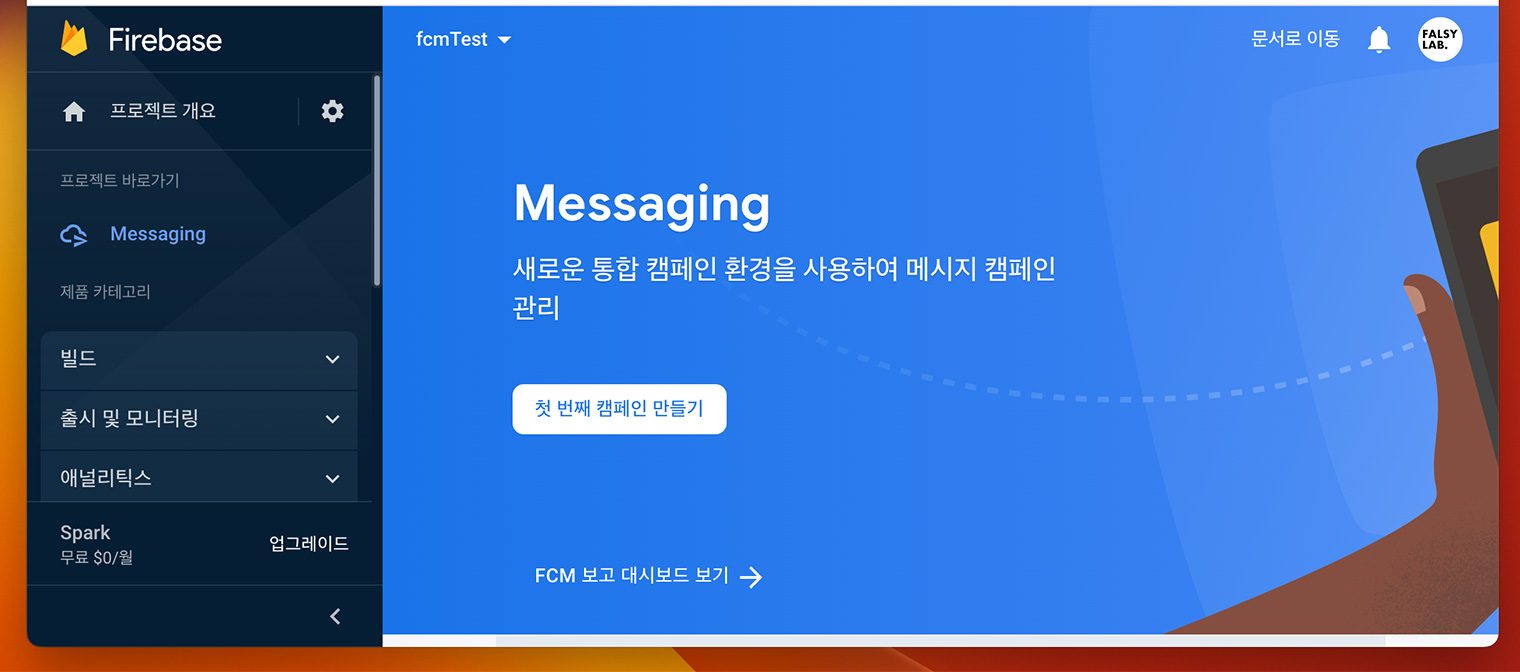
위와 같이 ‘첫 번째 캠페인 만들기’ 버튼을 선택합니다.
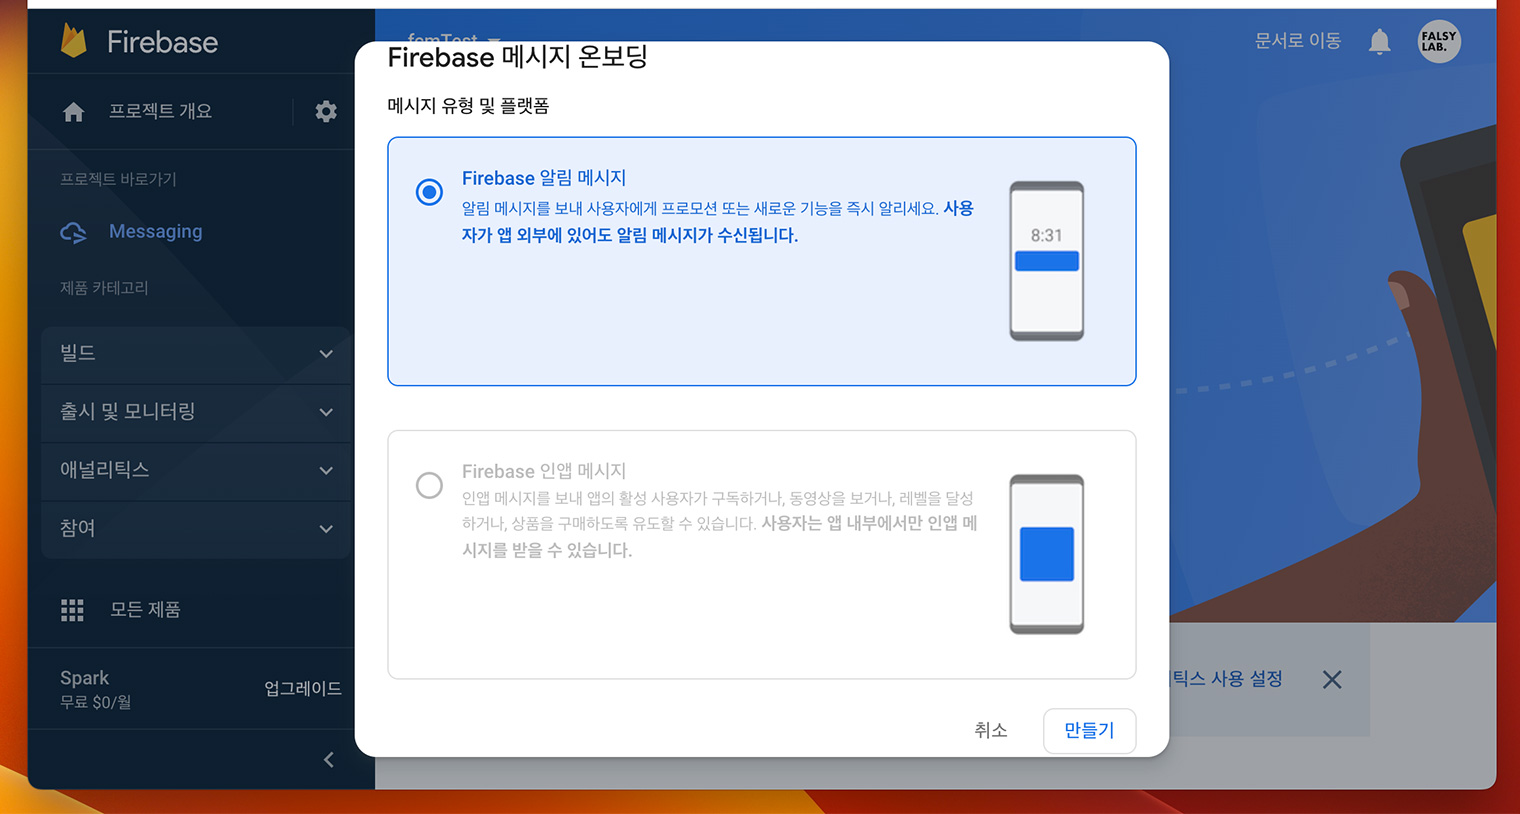
‘Firebase 알림 메시지’를 선택한 후 ‘만들기’ 버튼을 선택합니다.
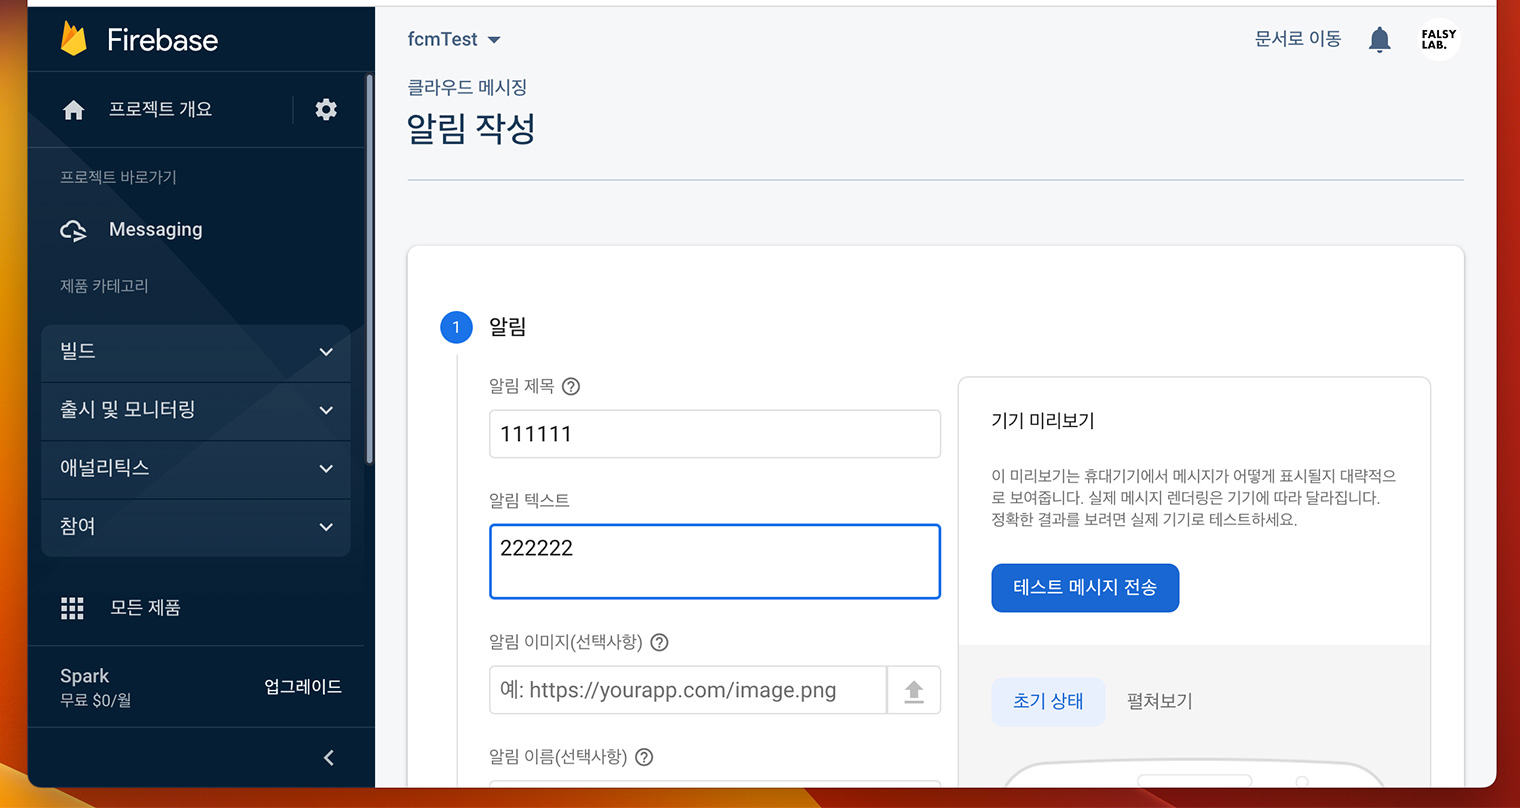
적당히 ‘알림 제목’과 ‘알림 텍스트’를 입력하시고 오른쪽에 ‘테스트 메시지 전송’ 버튼을 눌러줍니다.
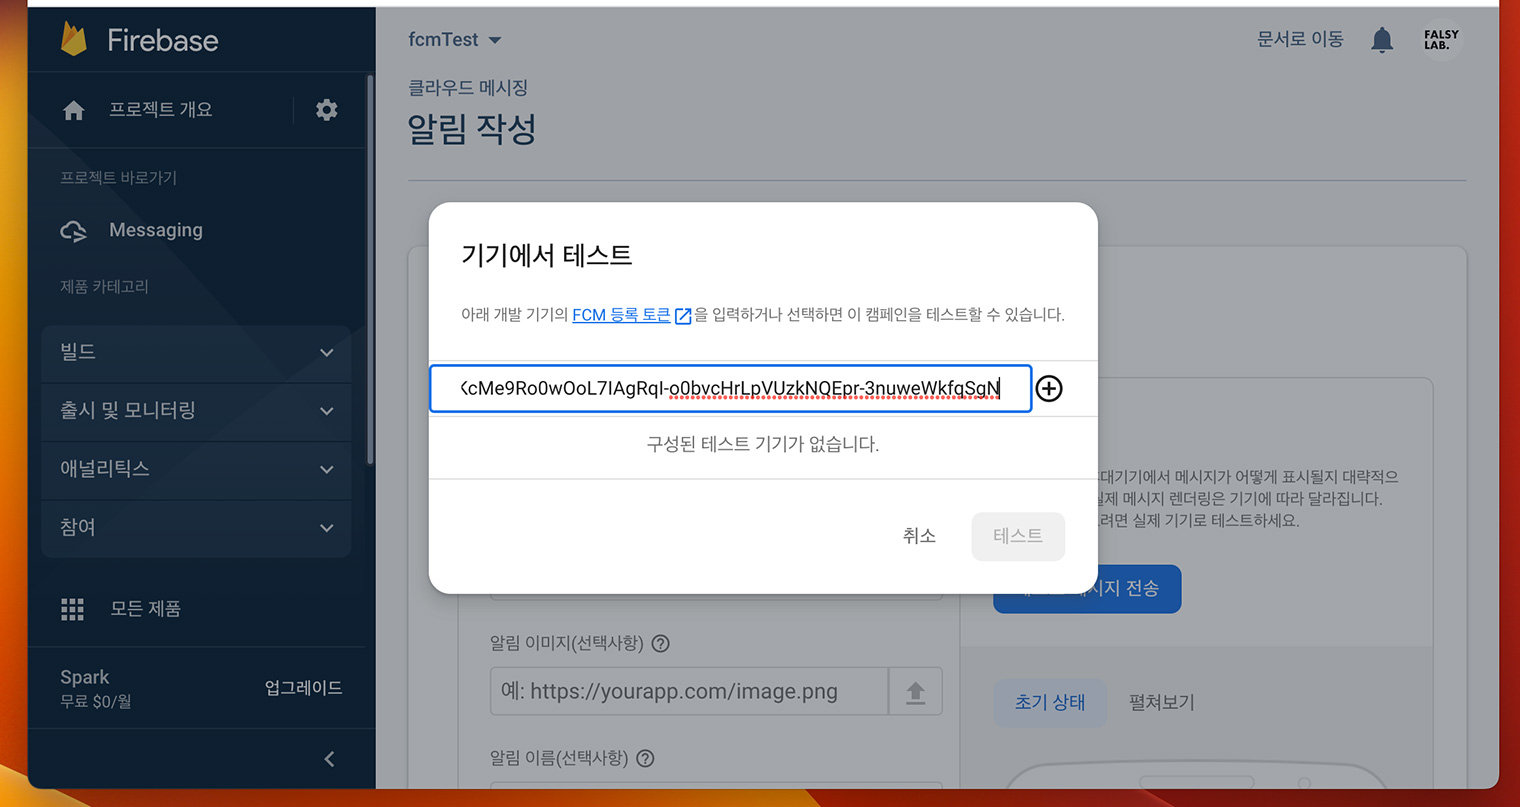
아까 콘솔창에 출력시켜서 복사해두었던 토큰 값을 넣어준 후 ‘+’ 버튼을 누르고, 체크한 후 테스트 버튼을 누르면!
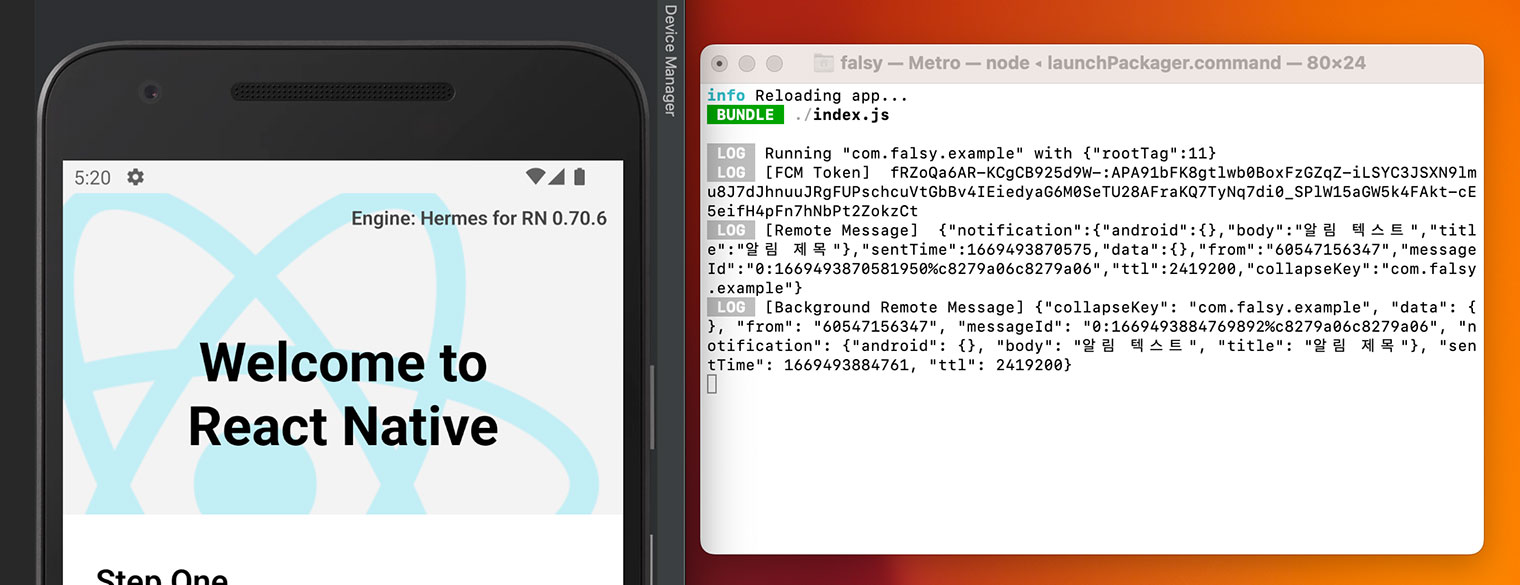
짜잔, 위와 같이 앱이 활성화되어 있을 때, 비활성화되어 있을 때 모두 메세지가 수신되어 로그가 찍히는 것을 확인할 수 있습니다.
* https://rnfirebase.io/
* https://velog.io/@kwonh/ReactNative-%ED%91%B8%EC%89%AC%EC%95%8C%EB%A6%BC-%EA%B3%B5%EC%8B%9D%EB%AC%B8%EC%84%9C-%EB%94%B0%EB%9D%BC%ED%95%98%EA%B8%B0-Firebase-Cloud-Messaging-react-native-firebase-notification-%EC%95%88%EB%93%9C%EB%A1%9C%EC%9D%B4%EB%93%9C
* https://velog.io/@ddowoo/React-native-%ED%91%B8%EC%8B%9C%EC%95%8C%EB%A6%BC-%EA%B5%AC%ED%98%84notifeereact-native
저 만큼 리액트 네이티브도, 안드로이드 스튜디오도 익숙하지 않은 분이라면…
돼야할 코드가 되지 않는다면.. 캐시 문제일 확률이 높아요!
|
1 |
$ npm start --reset-cache |
를 실행하고 다시 실행해 보시고, 그래도 되질 않는다면,
|
1 |
$ watchman watch-del-all |
를 실행하고 다시 실행해보시고, 그래도 되질 않는다면,
안드로이드 스튜디오에서 ‘File’ > ‘Invalidate Caches…’ 를 실행해서 캐시를 제거해주고 다시 실행해보세요!